HDMI cables play a crucial role in sending high-definition pictures and sound from your PC to another device, such as a monitor, TV, or projector. However, when the cable is plugged in but there’s no video or audio, the issue may lie with the HDMI port. Signs of HDMI port issues include a black screen, a “no input” message, or a pixelated display.
For users relying on HDMI connections for work or entertainment, a malfunctioning port can be frustrating. If you’re experiencing display issues, it’s essential to troubleshoot the problem efficiently. You can start by checking the HDMI connection and ensuring that the system is properly configured.
Understanding the common causes of HDMI port problems and applying the right fixes can resolve the issue. This guide will walk you through the steps to diagnose and fix HDMI-related problems on your Windows PC or device.
HDMI connectivity problems on PCs can stem from various hardware and software issues. To effectively troubleshoot these issues, it’s crucial to understand their root causes.
Common Signs of HDMI Port Problems
Identifying the signs of HDMI port problems is the first step towards resolving the issue. Common indicators include:
No signal or a weak signal detected on the HDMI-connected device
Intermittent connection issues, such as flickering or dropping the signal
Failure to detect the HDMI device altogether
These signs suggest that there’s an underlying issue that needs to be addressed, whether it’s related to the HDMI port, the connected device, or the graphics driver.
Several factors can cause HDMI ports to stop working. These include:
Damaged or corrupted hardware, such as a faulty HDMI port or graphics card
Outdated or corrupted graphics drivers, which can be resolved by updating or reinstalling them
Improper display settings or conflicts with recently installed software
For more detailed troubleshooting steps, you can refer to this guide on fixing HDMI port issues. Understanding these causes can help you target your troubleshooting efforts more effectively.
Quick Fixes for HDMI Port Not Working on PC
When your HDMI port stops working, it can be frustrating, but there are several quick fixes you can try. Often, the issue can be resolved with some basic troubleshooting.
Check Your HDMI Cable Connection
First, ensure that your HDMI cable is properly connected to both your PC and your display device. A loose connection can cause the HDMI port to malfunction. Check that the cable is securely plugged into the correct ports on both devices. If you’re using an adapter or switch, try connecting the HDMI cable directly to your PC to rule out any issues with the intermediary device.
Test Different HDMI Cables
If your HDMI cable is damaged or faulty, it can prevent the HDMI port from working correctly. Try using a different HDMI cable to see if the problem persists. If you have a spare HDMI cable, swap it with the current one and check if your HDMI connection is restored. This simple step can help you determine if the issue lies with the cable or the port.
Restart Your Devices
A simple restart can often resolve HDMI connectivity issues. Begin by unplugging the HDMI cable from your PC. Then, go to the Start menu, click on the Power button, and select Restart. After your PC has restarted, reconnect the HDMI cable and check if the connection is working. It’s also a good idea to restart your display device as well, as issues can occur on either end of the connection. For Windows PCs, using a safe restart method can help prevent potential system issues.
Configuring Display Settings for HDMI Connection
Proper display settings are the key to enjoying uninterrupted video and audio via HDMI. When connecting your device to a display using an HDMI cable, it’s essential to configure your display settings correctly.
Adjusting Display Modes
To adjust your display mode in Windows, you can use the Windows key + P shortcut. This will open the projection menu, where you can choose from various display modes such as PC screen only, Duplicate, Extend, or Second screen only. Selecting the right display mode depends on your specific requirements, whether you’re looking to mirror your screen or extend your desktop.
Setting HDMI as Default Audio Device
If you’re not getting audio through your HDMI connection, you may need to set the HDMI device as your default audio output. To do this, right-click on the Volume icon on the Task Bar, go to the “Playback” tab, and select the HDMI device you want to set as default. Click on “Set Default” and then “Ok.” This ensures that audio is played through the HDMI connection, providing a seamless viewing experience.
By configuring your display settings and setting your HDMI device as the default audio output, you can enjoy both video and audio through your HDMI connection without any issues.
Updating and Reinstalling Graphics Drivers
To troubleshoot HDMI issues, updating or reinstalling your graphics driver is a critical step. Ensuring your graphics drivers are current can resolve connectivity problems and improve overall system performance.
How to Update Graphics Drivers
Updating your graphics drivers involves accessing the Device Manager on your Windows system. To do this, type “device manager” in the search box on the taskbar and select Device Manager. Locate your graphics device, right-click it, and choose “Update driver.” Windows will then search for and install any available updates. This process ensures your graphics driver is compatible with the latest software and hardware, potentially resolving HDMI connectivity issues.
Reinstalling Graphics Drivers When Updates Don’t Work
If updating your graphics driver doesn’t resolve the HDMI issue, reinstalling the driver may be necessary. To do this, open the Device Manager again, right-click your graphics device, and select “Uninstall device.” Check the box that says “Delete driver software” to remove the current driver software. After uninstalling, restart your laptop or computer. Upon restarting, Windows will automatically reinstall the basic graphics driver. For optimal performance, you may then want to manually install the latest driver from your device manufacturer’s website. This step can help resolve persistent driver-related HDMI issues.
Uninstall device, delete driver software, restart system
Basic driver reinstalled, ready for manual update
Advanced Troubleshooting for HDMI Port Issues
When basic troubleshooting steps fail to resolve HDMI connectivity issues, it’s time to delve into advanced troubleshooting methods. This involves a more detailed examination of your system’s settings and potential conflicts that could be hindering HDMI functionality.
Running Hardware and Devices Troubleshooter
Windows provides a built-in Hardware and Devices Troubleshooter that can automatically detect and fix problems. To run this tool, type “Control Panel” in the search box on the taskbar, select it, and then navigate to “Troubleshooting” > “Hardware and Sound” > “Hardware and Devices”. Follow the on-screen instructions to complete the troubleshooting process. This can help resolve issues related to your HDMI port.
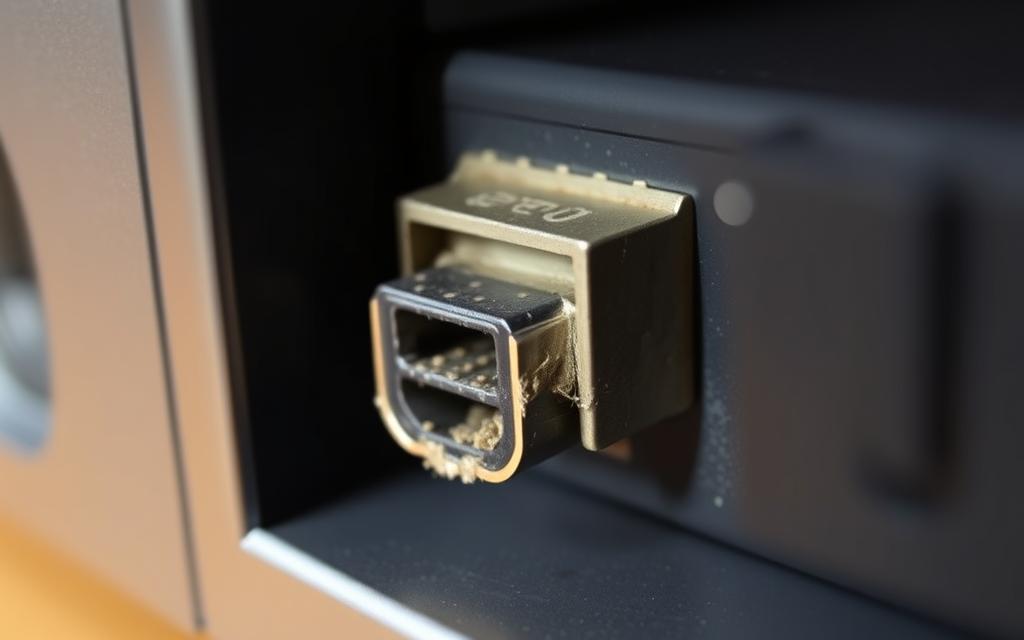
Checking for Physical Damage to HDMI Port
Physical damage to the HDMI port can cause connectivity issues. Inspect your laptop or computer’s HDMI port for any signs of damage, such as bent pins or debris. If you find any damage, you may need to have it repaired or consider using a different port if available.
Quote from an expert:
“Physical inspection is crucial. Sometimes, the issue is as simple as a loose connection or a damaged port.”
Removing Recently Installed Software
If you’ve recently installed new software, it might be conflicting with your HDMI connection. To uninstall software, go to the Control Panel, select “Programs” > “Programs and Features”, right-click on the program you wish to remove, and click “Uninstall” or “Uninstall/Change”. Follow the on-screen directions and restart your system to see if this resolves the HDMI issue.
Some software, particularly graphics-intensive programs or those that modify display settings, can interfere with HDMI functionality. By identifying and uninstalling recently installed software that coincides with the onset of HDMI issues, you can potentially resolve the problem.
Restarting your system after software removal is crucial to ensure that the changes take effect.
Conclusion: Ensuring Long-Term HDMI Functionality
To maintain a reliable HDMI connection, regular maintenance is key. Throughout this article, we’ve explored various troubleshooting steps to resolve HDMI port issues, including checking cable connections, updating graphics drivers, and configuring display settings.
To prevent future HDMI issues, it’s essential to handle cables with care, avoid damaging the HDMI port, and keep your system and graphics drivers updated. Regularly cleaning dust or debris from ports can also help maintain optimal functionality.
Key Takeaways: Regular maintenance, such as updating drivers and handling cables carefully, can significantly reduce the risk of HDMI issues. If problems persist, it may be necessary to seek professional help to diagnose and repair any underlying hardware faults.
By following these guidelines and staying proactive, you can ensure a stable and high-quality HDMI connection for your devices, enjoying uninterrupted video and audio.
FAQ
Why is my HDMI connection not displaying anything on my monitor?
Ensure that your HDMI cable is securely connected to both your computer and monitor. Try using a different HDMI cable or display input to rule out any issues with the current setup.
How do I set HDMI as my default audio device in Windows?
To set HDMI as your default audio device, go to Sound settings in Windows, click on “Playback devices,” and select the HDMI device from the list. Right-click on it and choose “Set as Default Device.”
What should I do if my graphics drivers are outdated and causing HDMI issues?
Update your graphics drivers by going to the Device Manager, locating your graphics card under “Display Adapters,” right-clicking on it, and selecting “Update driver.” You can also visit the manufacturer’s website to download the latest drivers.
Can a faulty HDMI cable cause connection problems?
Yes, a damaged or faulty HDMI cable can cause connection issues. Try replacing the cable with a new one to see if it resolves the problem.
How do I run the Hardware and Devices Troubleshooter in Windows?
To run the Hardware and Devices Troubleshooter, go to Settings > Update & Security > Troubleshoot, and click on “Hardware and Devices.” Follow the on-screen instructions to complete the troubleshooting process.
What if my HDMI device is not listed in the Sound settings?
If your HDMI device is not listed, ensure that it is properly connected and turned on. You may also need to check your display settings or update your audio drivers to resolve the issue.
Is it necessary to reinstall graphics drivers when updates don’t work?
Reinstalling graphics drivers can sometimes resolve issues that updating doesn’t fix. To reinstall, go to Device Manager, locate your graphics card, right-click on it, and select “Uninstall device.” Then, restart your computer to allow Windows to reinstall the drivers.
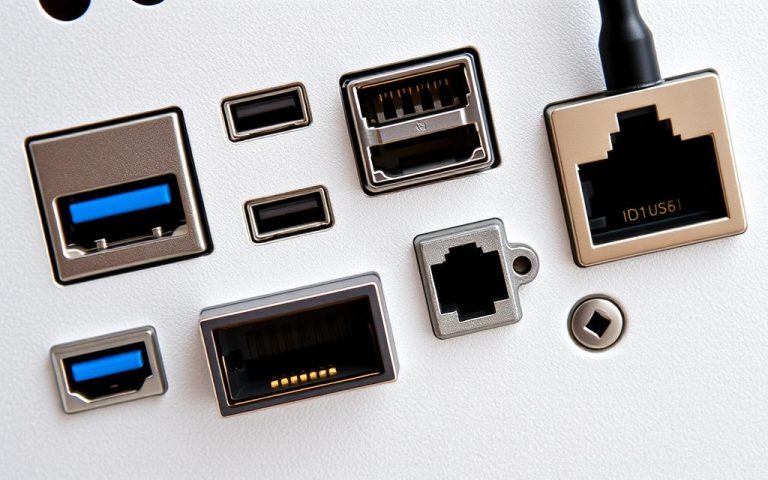
Modern computers are equipped with a variety of ports that serve as interfaces for connecting external devices and facilitating data transfer. These ports play a crucial role in enabling communication between the computer and peripherals. The number and types of ports on a computer can vary significantly, depending on the device’s intended use and design….
The FNF Vs. Mario’s Madness V2 mod has taken the gaming world by storm, especially among enthusiasts of creepypasta-inspired content and Friday Night Funkin’ mods. As the third installment in the Mario ’85 PC Port mod series, it has garnered significant attention for its unique blend of Super Mario Bros. characters and frightening storylines. Gaming…
The Infinity Blade game, originally released in 2010 by Chair Entertainment, was a groundbreaking achievement in mobile gaming. However, after being delisted from the App Store in 2018 and subsequently removed in 2020, the game became impossible to obtain legally. The Infinity Blade PC port aims to preserve this classic gaming experience. This preservation effort…
Many users encounter issues when trying to host servers on their personal computers. Common problems include ports appearing closed even after configuration, servers not showing up in browsers, and connection failures despite following standard setup procedures. Understanding why server ports fail to work is crucial for successfully hosting applications, games, or web services from your…
As the cryptocurrency landscape continues to evolve, the importance of security on trading platforms cannot be overstated. With over 100 million users, Crypto.com has established itself as one of the largest crypto exchange platforms globally. Founded in 2016, the company has made significant strides in regulatory compliance, holding licenses in multiple jurisdictions, including the UK,…
The computer USB port voltage is key for many gadgets. Usually, these ports give out 5 volts, keeping things consistent for all USB types. Knowing these USB power specifications helps make sure devices work right and stay safe. USB ports normally have a stable 5 volts output. This is without any gadgets plugged in. When…