Experiencing issues with your PC’s audio output can be frustrating, especially when you’re in need of sound for work, gaming, or entertainment purposes. If your headphones aren’t producing the desired audio, it’s likely due to a problem with the headphone jack or the computer’s settings.
This comprehensive guide will walk you through various troubleshooting methods to diagnose and fix the issue on your Windows PC. We’ll cover both hardware and software-related problems, providing solutions ranging from simple checks to advanced troubleshooting techniques to get your headphones working properly again.
By following our step-by-step instructions, you’ll be able to systematically identify and resolve the issue, potentially saving time and money on unnecessary repairs or replacements. Understanding the root cause of the problem is crucial for implementing the correct fix, whether it’s a driver issue, hardware malfunction, or system configuration problem.
Understanding Why Your Headphone Port Is Not Working on PC
The issue of a headphone port not working on a PC is a common problem that can stem from various causes. Understanding the root cause is crucial to resolving the issue effectively.
Common Causes of Headphone Jack Failures
Several factors can contribute to headphone jack failures. Physical damage to the jack or headphones can prevent proper functioning. Additionally, dust and debris accumulation inside the jack can impede connection. Outdated or corrupted audio drivers are another leading cause, as they serve as the interface between hardware and the operating system.
How to Identify if the Problem Is Hardware or Software Related
Distinguishing between hardware and software issues is vital for effective troubleshooting. Software problems typically affect all audio devices, while hardware issues may be isolated to specific ports. Checking the device settings in Windows and ensuring that the headphones are set as the default playback device can help identify the issue.
By understanding the common causes and identifying whether the problem is hardware or software related, you can take the first steps towards resolving the issue with your PC’s headphone port.
Quick Fixes to Try First
When your PC’s headphone port stops working, there are several quick fixes you can try before diving into complex troubleshooting. Ensuring that your headphones are properly connected and functioning correctly is a good starting point.
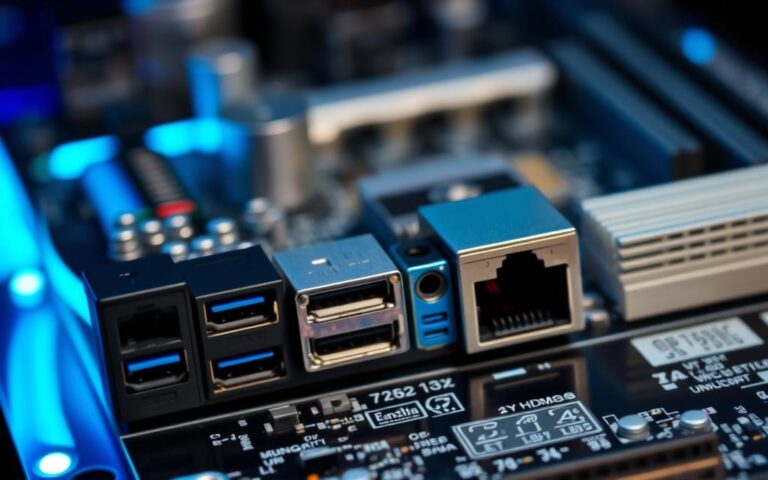
Check Physical Connections and Headphone Functionality
First, make sure your headphones are plugged into the correct headphone jack. Most PCs have the headphone jack color-coded in green or marked with a headphone icon. Test your headphones with another device, such as a smartphone or tablet, to verify they’re working properly. This simple test can help determine if the issue lies with your headphones or your PC.
Adjust Volume Settings and Sound Controls
Sometimes, the issue might be as simple as the volume being muted or set too low. Click the sound icon on the lower-right of your screen and move the volume slider to at least halfway up. Check all volume controls that might affect your audio output, including the Windows volume mixer and individual application settings. Ensure that your audio isn’t muted by checking the speaker icon in the Windows taskbar.
Restart Your Computer with Headphones Plugged In
A simple system restart with headphones already plugged in can resolve many temporary glitches. This action forces Windows to detect and initialise the audio device during the boot process. Additionally, for desktop computers with both front and rear audio ports, try connecting your headphones to the alternative port, as one may be disabled or malfunctioning while the other works properly.
By attempting these quick fixes, you can potentially resolve the issue with your PC’s headphone port without needing to delve into more complex troubleshooting steps.
Configuring Sound Settings in Windows
Configuring sound settings in Windows is crucial for resolving headphone connectivity issues. When your headphones are not working, it’s often due to incorrect sound settings rather than a hardware fault.
Setting Headphones as Default Playback Device
To ensure your headphones work properly, you need to set them as the default playback device. Right-click on the sound icon in the lower-right corner of your screen, then click “Sounds.” In the Playback tab, unplug and re-plug your headphones into the headphone jack to ensure “Headphones” (or “Speakers/Headphones”) is selected. Click “OK” to save the changes.
Setting your headphones as the default device is essential because Windows may prioritise other audio outputs, such as built-in speakers, even when headphones are connected.
Showing Hidden and Disabled Audio Devices
Sometimes, Windows hides disconnected or disabled audio devices, making troubleshooting difficult. To reveal these hidden devices, right-click anywhere in the Playback devices list and select “Show Disabled devices.” If your headphones are listed but not working, right-click on them and select “Enable.” You can then click “Set as Default” to make sure they’re used for audio output.
Action
Description
Right-click Sound Icon
Access Sound settings
Select Playback Tab
View available playback devices
Show Disabled Devices
Reveal hidden or disabled devices
Enable Headphones
Make sure headphones are not disabled
Set as Default
Set headphones as the default playback device
Changing the Default Sound Format
Audio format mismatches can cause headphones to appear connected but produce no sound. To resolve this, click on the Advanced tab and change the default sound format from the drop-down menu to a different setting. Experimenting with different sample rates and bit depths may resolve compatibility issues with your headphones.
By following these steps, you can configure your Windows sound settings to ensure your headphones work correctly. Proper configuration can often resolve connectivity issues without needing further troubleshooting.
Resolving Headphone Port Not Working PC Issues Through Driver Management
To fix a non-responsive headphone port on your PC, it’s essential to examine your audio drivers and potentially update or reinstall them. Audio driver issues are among the most common causes of headphone port problems, as these software components facilitate communication between your operating system and audio hardware.
Updating Audio Drivers Through Device Manager
One of the simplest ways to update your audio drivers is through the Device Manager. To do this, press and hold the Windows key, then press R to launch the Run application. Type in “devmgmt.msc” and hit the OK button to bring up the Device Manager. Expand the Sound, video, and game controllers section, right-click on your audio driver, and select Update Driver. Click on Search automatically for updated driver software. If Windows can find an updated driver, it will automatically download and install the update to your computer.
Downloading Manufacturer-Specific Audio Drivers
For optimal performance and compatibility, downloading audio drivers directly from your computer or motherboard manufacturer’s support website is recommended. These drivers are specifically designed for your hardware configuration, ensuring the best possible sound quality and functionality. Visit the manufacturer’s website, navigate to the support or downloads section, and search for the latest audio drivers compatible with your device.
Rolling Back or Reinstalling Problematic Drivers
If updating your drivers doesn’t resolve the issue, you may need to roll back to a previously working driver version or reinstall the current driver. Rolling back can be effective, especially if problems began after a recent driver or Windows update. To reinstall, uninstall the current audio driver, optionally with the “Delete the driver software for this device” checkbox selected, and then allow Windows to reinstall it automatically upon restart or manually install the correct driver.
After making any changes to your drivers, it’s crucial to restart your system to ensure the new driver is properly initialised and all audio services are correctly configured. This step is essential for resolving headphone port issues related to driver management.
Using Windows Troubleshooting Tools
When headphones aren’t working, Windows provides built-in troubleshooting tools to diagnose and fix common audio issues. These tools are designed to save time and reduce the need for manual intervention, making it easier to resolve problems with your headphone jack or audio settings.
Running the Windows Audio Troubleshooter
To start troubleshooting, open the Settings app by pressing the Windows + I keys or by clicking on the gear icon in the Start menu. Navigate to the Update & Security section, then choose Troubleshoot from the left-side menu. Click on Playing Audio under the Get up and running category, and then click the Run the troubleshooter button. The Audio Troubleshooter will check for issues such as incorrect default device settings, disabled audio services, or driver problems that might prevent your headphones from working properly.
If the troubleshooter detects any issues, you have the option to fix them automatically. This process can help resolve common sound problems, ensuring your headphones are recognised by your system.
Using Hardware and Devices Troubleshooter
In addition to the Audio Troubleshooter, Windows also offers a Hardware and Devices Troubleshooter. This tool provides a broader diagnostic approach, identifying issues with the physical connection between your headphones and computer, including potential problems with USB controllers or power management settings.
To access the Hardware and Devices Troubleshooter, follow a similar path in the Settings app: Update & Security > Troubleshoot. While the direct access might vary slightly between Windows 10 and Windows 11, the functionality remains similar. After running the troubleshooter, it’s advisable to restart your computer to ensure any changes take full effect.
Advanced Solutions for Persistent Problems
When basic troubleshooting fails to resolve headphone issues on your PC, it’s time to explore advanced solutions. Persistent problems with your headphone jack can be frustrating, but there are several steps you can take to address the issue.
Disabling Front Panel Jack Detection (Realtek Users)
For Realtek audio users experiencing front panel headphone port issues, disabling front panel jack detection in the Realtek HD Audio Manager can resolve detection problems. To do this, search for the Control Panel in your search bar, then open the application from your results. Change your view mode to Large icons and click on the Realtek HD Audio Manager. Click on the Connector Settings icon, turn on the Disable front panel jack detection option, and press the OK button. Restart your computer to apply the changes.
Cleaning the Headphone Jack Safely
Physical cleaning of the headphone jack should be approached with caution. Power off your device completely before attempting any cleaning to avoid electrical damage or short circuits. Use a compressed air can to dislodge dust and debris without making physical contact with the sensitive components inside the jack. For more thorough cleaning, a cotton swab lightly moistened with isopropyl alcohol can be carefully inserted and rotated to remove stubborn debris or oxidation from the contact points.
Cleaning Method
Description
Safety Precaution
Compressed Air
Dislodges dust and debris
Avoid shaking the can
Cotton Swab with Isopropyl Alcohol
Removes stubborn debris or oxidation
Ensure the swab is not dripping wet
Checking for Windows Update Issues
Recent Windows updates can sometimes cause audio device compatibility issues. Check your Update History in Settings > Windows Update > Update history to identify problematic updates that coincided with the onset of headphone problems. Problematic Windows updates can be uninstalled through Settings > Windows Update > Update history > Uninstall updates, allowing you to revert to a previous working state while waiting for Microsoft to release a fix.
By exploring these advanced solutions, you can often resolve persistent headphone issues that simpler troubleshooting methods cannot address.
Conclusion
Resolving headphone port issues on your PC can be achieved through a systematic approach, starting with simple checks and progressing to more advanced solutions as needed. Most problems can be resolved through software adjustments, such as configuring correct sound settings and updating audio drivers. Regular maintenance, including keeping your Windows system and audio drivers updated, can prevent many issues. For persistent problems, consider using external USB audio adapters or Bluetooth headphones as viable alternatives. Understanding the relationship between your operating system, audio drivers, and hardware empowers you to diagnose and resolve issues effectively. By following these steps, you can ensure your headphones are working properly and enjoy uninterrupted audio.
FAQ
Why is my headphone jack not functioning properly on my computer?
The issue could be due to a hardware or software problem. Check if the headphone jack is clean and free from debris. Also, ensure that the audio drivers are up-to-date and functioning correctly.
How do I set my headphones as the default playback device in Windows?
To set your headphones as the default playback device, go to the Sound settings, click on the Playback tab, and select your headphones from the list of available devices. Right-click on the device and choose “Set as Default Device”.
What should I do if my computer is not recognising my headphones?
Try restarting your computer with the headphones plugged in. If the issue persists, check the Device Manager for any issues with the audio drivers and update them if necessary.
How do I update my audio drivers to resolve the headphone issue?
You can update your audio drivers through the Device Manager. Locate the sound card, right-click on it, and choose “Update driver”. Alternatively, you can download and install the latest drivers from the manufacturer’s website.
Can a faulty sound card cause issues with my headphone jack?
Yes, a faulty sound card can cause problems with your headphone jack. If you’ve tried updating drivers and troubleshooting, you may need to consider replacing the sound card or seeking professional assistance.
How do I run the Windows Audio Troubleshooter to resolve my headphone issue?
To run the Windows Audio Troubleshooter, go to the Settings app, click on “Update & Security”, and then select “Troubleshoot” from the left menu. Click on “Playing Audio” and follow the prompts to complete the troubleshooting process.
A stable Ethernet connection is crucial for reliable internet access on your computer. Troubleshooting connection issues is essential to maintaining a fast and stable network. Wired Ethernet connections often provide faster speeds and more stability compared to wireless alternatives. This comprehensive guide will help you identify, diagnose, and resolve common Ethernet port problems on your…
Computer ports are physical docking points on a computer that enable users to connect various external devices, facilitating data transfer and communication. A port acts as an interface between the computer and devices such as a mouse, printer, or modem. The significance of ports in modern computing cannot be overstated. They have evolved over time…
Many computers today lack HDMI ports, which are crucial for connecting to modern displays. This makes it tough to enjoy HD content. But, there’s a solution to add an HDMI port to your computer. If you don’t have one, consider a computer upgrade like installing a new graphics card. You can also use adapters for existing…
Understanding computer ports helps with better connectivity and safety. These ports have unique numbers that let different apps talk over the internet. There are 65,535 ports split into three types: well-known, registered, and dynamic. It’s crucial to know how to find these ports on your computers. This guide will show you how to check port…
USB ports are vital in today’s tech world. They connect devices like hard drives, keyboards, and smartphones to computers. This article will show you how to replace USB ports on both desktop and laptop computers. You’ll learn about common problems, how to fix them, and step-by-step instructions for replacement. Knowing how USB ports work and…
The Pilatus PC-6 Porter is a testament to innovative aircraft design, boasting an impressive service history that spans over six decades. First flown in 1959, this single-engined STOL utility aircraft has been produced in various configurations, including piston engine and turboprop versions. Renowned for its exceptional capabilities, the PC-6 has operated in environments typically accessible…